Up to now, I’ve been using Ollama as my platform to research the requirements for processing massive amounts of Intel Processor Trace. But it now seems that I’ll need a more sophisticated development environment to accomplish the model fine-tuning I need to do; so, I’ve switched over to Hugging Face.
In Part 1 and Part 2 of this article series, I worked with the Ollama framework. Those who are familiar with both Ollama and Hugging Face can skip this part: the main difference between the two is that Ollama is a runtime environment for running models locally, while Hugging Face is a collaborative hub for building and sharing AI assets. And since I plan to open-source this work, and Ollama seems more limited in its ability to customize my model, I’m more inclined to work with Hugging Face. A good comparison table is here:
| Feature | Ollama | Hugging Face |
| Primary Role | A local runtime for LLMs | A hub for models, datasets, and tools |
| Data Privacy | Excellent (all data stays local) | Cloud-based services may process data in the cloud |
| Latency | Extremely low (no network overhead) | Varies, dependent on network and server load |
| Scalability | Limited to your local hardware | Virtually unlimited via cloud services |
| Model Access | A curated list of popular models | Thousands of models across all modalities |
| Customization | Via simple Modelfile syntax | Via code using libraries like PEFT |
| Relationship | Often used together. Ollama can pull models from the Hugging Face Hub (GGUF format) and run them locally. | The source for most models that Ollama runs. |
Again, I used Tech with Tim’s work as a foundation for this research. It’s really an excellent channel, one of the better ones on YouTube. Have a look at the following links as references:
LangChain Explained In 15 Minutes – A MUST Learn For Python Programmers
HuggingFace + Langchain | Run 1,000s of FREE AI Models Locally
Hugging Face uses the Transformers Python library to work with its models. As with Ollama, you can download these models to your local computer and run them on your own hardware – subject to the VRAM requirements that I referred to in Part 1. Also, the LangChain Python library provides some advanced features that I’ll need. Finally, the PyCharm application makes working in this environment so much easier. Let’s walk through the steps, and I’ll explain how all these fit together.
The first step is to create a userid on Hugging Face. Simple enough.
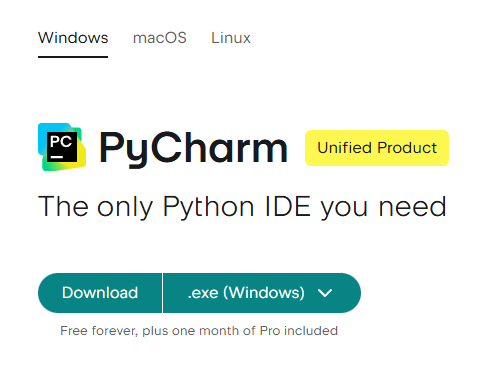
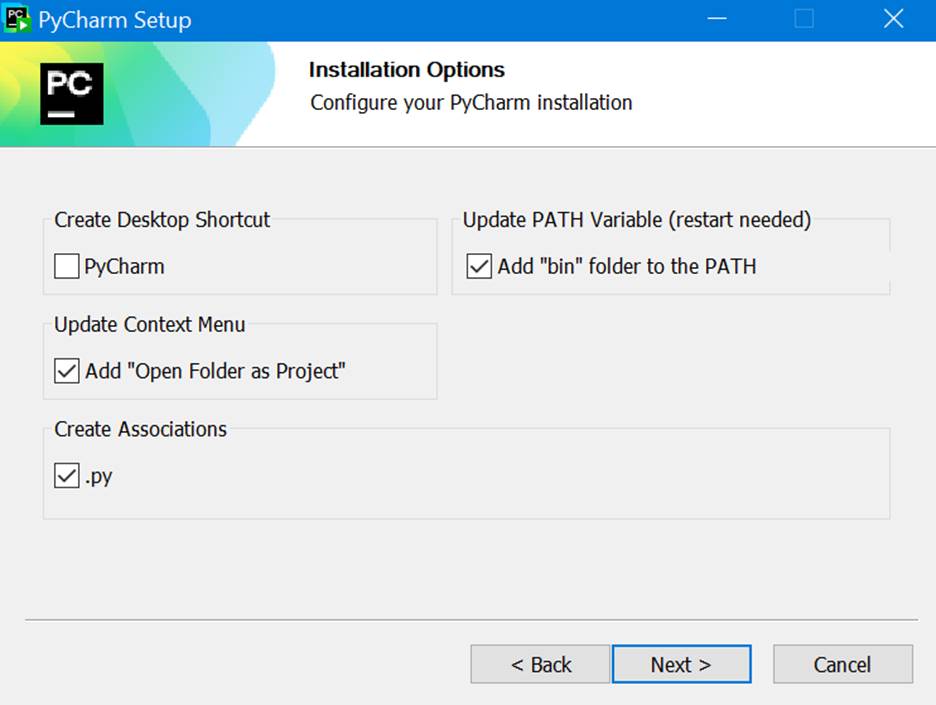
Then download and install JetBrains’ PyCharm application, Community Edition. Note in Tim’s video above, he mentions a promotion for the Professional Edition, to get three months of the Pro edition with every initial download. But I couldn’t find that. But I see that maybe more recently, JetBrains offers one month of the Pro edition with every initial download. That’s cool, so I took that. PyCharm has an integration with Hugging Face, as well as support for TensorFlow, git, PyTorch, jupyter notebooks, etc. It looks great.
I thought that it would be a good idea to set up the environment variable:
Of course, to follow the remaining content, it helps to have a working knowledge of Python, and to have Visual Studio Code installed on your station, with all needed extensions. If you’re not there yet, I recommend this written Visual Studio Code tutorial here: Getting Started with Python in VS Code.
Note that when I first installed PyCharm, it came up with the virtual environment already set up when I created a new Project. This makes life a lot easier by isolating my environment for this Project and avoiding the tricky Python dependencies that used to surface back in the old days. Thank you, new Python!
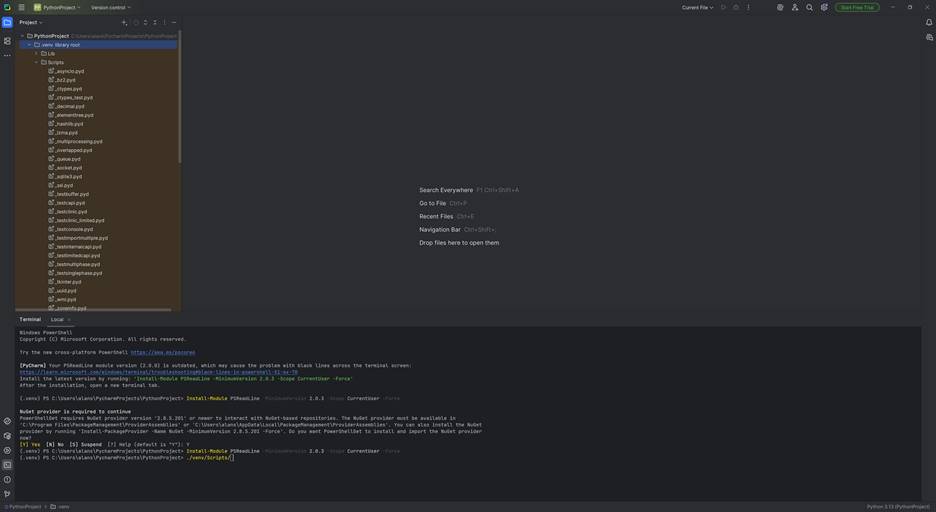
Once this is all set up, you can (to speed things up a little) set up a requirements.txt file, which is needed to configure everything for our work with the Transformers library and LangChain. Right-click on the Project name (in my case, I just named it PythonProject) and add it to the Project, then edit it to add these three lines:
transformers

langchain

langchain-huggingface
And then use pip to install all these modules into this environment:
(.venv) >pip install -r .\requirements.txt
It will run for a few minutes, and finally succeed. We’re almost ready to start coding, after we get our Hugging Face access token! This is a “keep them honest” way for Hugging Face to ensure that the license terms for the models are honored.
Go back into Hugging Face, click on your profile picture, and click on Access Tokens:

Then click on “Create New Token”, add in a Token name (anything you want), then hit the Read tab, and create it. Save your token in a safe place!
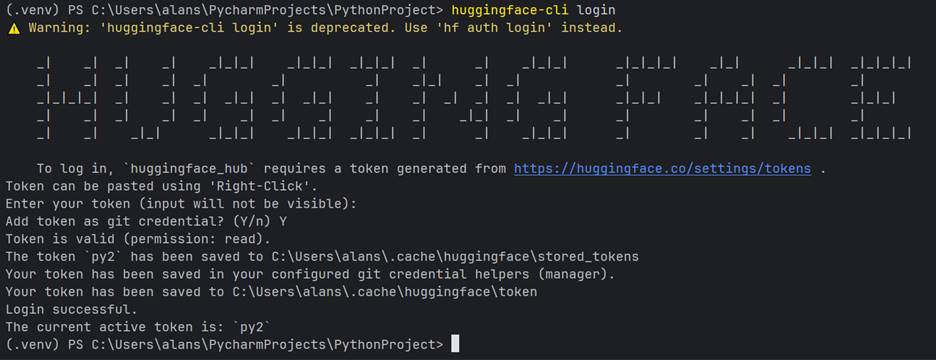
Then we’re ready to start the connection process. From your shell, type in:
(venv) >hf auth login
And you’ll see something like the below (you’ll have to enter your token, but it will remain invisible):
Note: for the main.py code below in Tim’s video, PyCharm compiled it like a charm:
from transformers import pipeline
model = pipeline("summarization", model="facebook/bart-large-cnn")
response = model("text to summarize")
print(response)
However, when I tried to run it, unlike in Tim’s video, it failed with the following error messages:
C:\Users\alans\PycharmProjects\PythonProject\.venv\Scripts\python.exe C:\Users\alans\PycharmProjects\PythonProject\main.py

None of PyTorch, TensorFlow >= 2.0, or Flax have been found. Models won't be available and only tokenizers, configuration and file/data utilities can be used.

None of PyTorch, TensorFlow >= 2.0, or Flax have been found. Models won't be available and only tokenizers, configuration and file/data utilities can be used.

Traceback (most recent call last):

  File "C:\Users\alans\PycharmProjects\PythonProject\main.py", line 3, in <module>

    model = pipeline("summarization", model="facebook/bart-large-cnn")

  File "C:\Users\alans\PycharmProjects\PythonProject\.venv\Lib\site-packages\transformers\pipelines\__init__.py", line 1018, in pipeline

    if isinstance(dtype, str) and hasattr(torch, dtype):

                                          ^^^^^

NameError: name 'torch' is not defined

Process finished with exit code 1
Apparently, we also need to download the NVIDIA CUDA toolkit (and driver) to use the GPU on my PC and pull in the PyTorch files. Go to https://developer.nvidia.com/cuda-downloads and initiate the download.
You MUST restart PyCharm for PyTorch to become visible, and to run the model.
Then, in the Terminal window, type in:
nvcc -- version
And in my case, I saw:
(.venv) PS C:\Users\alans\PycharmProjects\PythonProject> nvcc --version
nvcc: NVIDIA (R) Cuda compiler driver
Copyright (c) 2005-2025 NVIDIA Corporation
Built on Wed_Aug_20_13:58:20_Pacific_Daylight_Time_2025
Cuda compilation tools, release 13.0, V13.0.88
Build cuda_13.0.r13.0/compiler.36424714_0
Note that I have version 13.0 of the tools. So, this is used in the next step installing PyTorch:
>pip install torch torchvision torchaudio --index-url https://download.pytorch.org/whl/cu130
But this didn’t work! Apparently, as of the time of writing, this version of the Cuda compiler driver isn’t supported with PyTorch. I got this error message from pip:
Looking in indexes: https://download.pytorch.org/whl/cu130
ERROR: Could not find a version that satisfies the requirement torch (from versions: none)
ERROR: No matching distribution found for torch
I then decided to go with cu128 of the driver, keeping my fingers crossed:
>pip install torch torchvision torchaudio --index-url https://download.pytorch.org/whl/cu128
And, that successfully installed.
Then, it’s a simple matter of running my program, and the output is below:
Xet Storage is enabled for this repo, but the 'hf_xet' package is not installed. Falling back to regular HTTP download. For better performance, install the package with: `pip install huggingface_hub[hf_xet]` or `pip install hf_xet`

Device set to use cuda:0

Your max_length is set to 142, but your input_length is only 5. Since this is a summarization task, where outputs shorter than the input are typically wanted, you might consider decreasing max_length manually, e.g. summarizer('...', max_length=2)

[{'summary_text': 'CNN.com will feature iReporter photos in a weekly Travel Snapshots gallery. Visit CNN.com/Travel each week for a new gallery of snapshots. Please share your best shots of the U.S. with CNN iReport. Send your best photos of the United States to jennifer.smith@dailymail.co.uk.'}]

Process finished with exit code 0
Very cool! If you go into the Hugging Face Model card for this model, https://huggingface.co/facebook/bart-large-cnn, you can see that this is a BART (Bidirectional and Auto-Regressive Transformer) model, pre-trained on the English language, and find-tuned on the CNN Daily Mail dataset: https://huggingface.co/datasets/abisee/cnn_dailymail. That explains part of the text above.
There’s so much more to write about in this part of my research, but I’ll save the remainder for an upcoming article, where I’ll cover some of the advanced capabilities provided by LangChain, and start closing in on model fine-tuning.